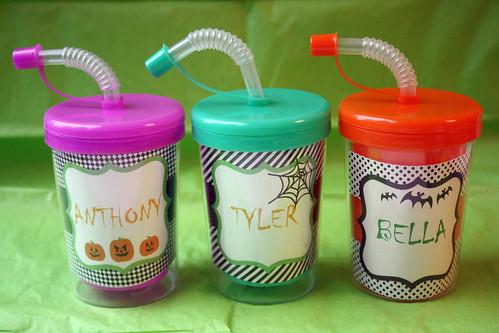
Remember these snack cups?

Not only are they cute but they're also super simple to make. Here's how:
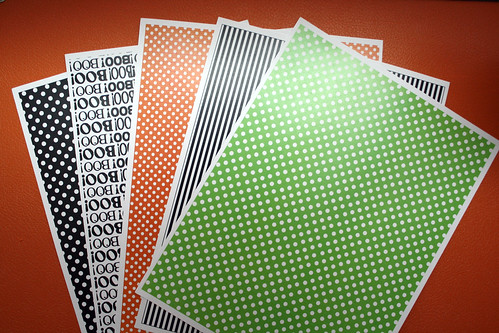
1. Gather some double-sided paper. You can use scrapbook paper or you can print patterned paper designs (like the ones Anders Ruff designed for G&A's party and include in their Halloween collection) onto both sides of card stock. Here's what the Halloween paper I printed looked like.
2. Cut the paper into strips that are 3 inches wide by 9 inches long.

3. Match up the pieces you want to use for each snack cup (you'll need two per cup) and punch holes in the corners at the top and bottom of each strip.

4. Fold each strip of paper at 3 inches and 6 inches so you have three equally sized squares. You can do this a few ways - hold a ruler at 3 and 6 inches and fold the paper up; use a paper bone folder to score the paper and then fold; or use the Martha Stewart Scoreboard to crease the paper at your fold points like I did.

Sorry, I have to interrupt this tutorial for just one second to tell you that the Martha Stewart Scoreboard is a lifesaver when I'm doing craft projects. You can use it to make boxes, pinwheels, envelopes, invitations and so much more. Best $20 I ever spent! Okay, now back to our how-to, already in progress....
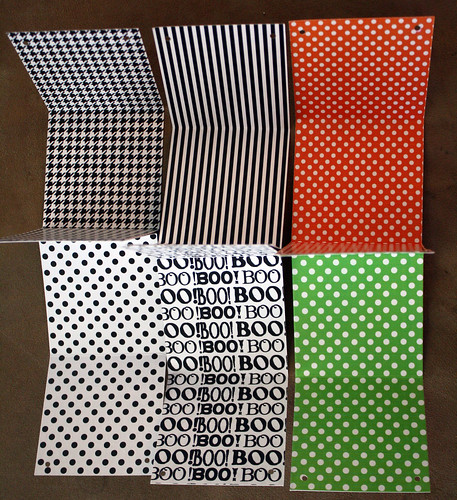
One you've folded your strips, they'll look like this:
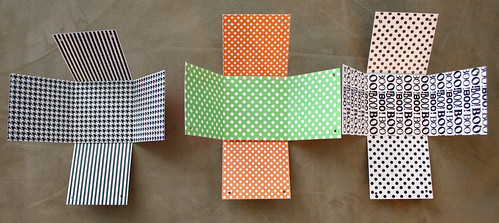
5. Take two of the strips with contrasting patterns and overlap them into a cross shape.

And use a glue stick or glue dots to attach the center pieces together.
6. Next, take some ribbon or string and run it through the holes in the corners to hold the paper together and create the box shape, then tie the ends into a knot. I used ric rac on these snack cups.
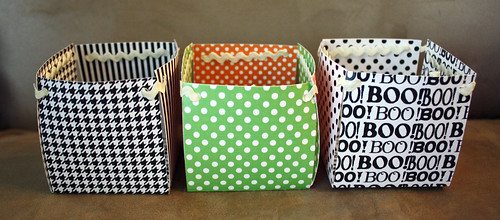
And that's it! Just fill them with snacks and they're ready to go on display. Or.....
You can go one step further and pimp them out a little but more. I used some of the party logos from the Anders Ruff printable package to add a little more ghoulishness to my boxes. I added a skeleton to this one and filled it with animal crackers.

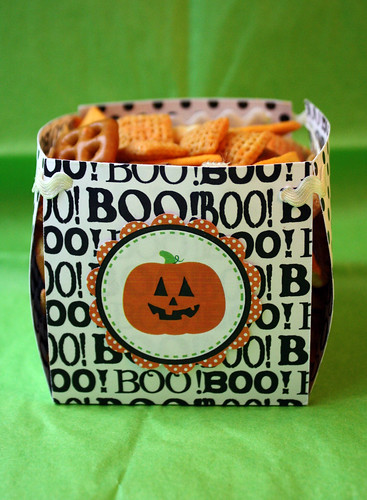
And the boo box got a Jack-o-Lantern logo and some Chex mix.
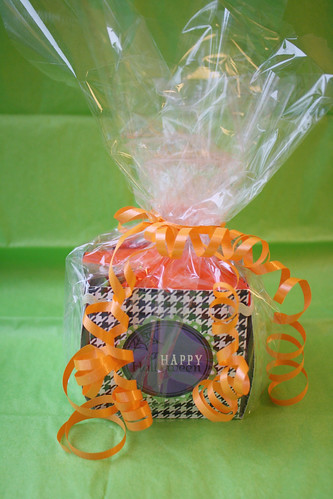
I wanted to try something different with the last one so I stuck a Happy Halloween logo sticker onto it, added some Reese's Peanut Butter cups and wrapped it cellophane. Presto- the perfect party favor!
There are so many more ways you can use these paper boxes so if you make some of your own, be sure to send us pictures so we can feature your handiwork here on AFOMFT! Now on to project number two. I've gotten tons of e-mails from people asking where I got or how I made the personalized sippy cups from Gabrielle and Alaina's party.

Here's the scoop. I bought these Design-Your-Own Cups from Oriental Trading (they're $9.99 per dozen).

I removed the paper that came inside and replaced it with labels I made from the printable package Anders Ruff designed for the girls' party. So simple and such a huge hit with the kids and parents! Since I had the Happy Halloween Printable Collection, I decided to craft up some scary sippies too. I made one set with the bottle wraps that come in the collection. What was meant for soda and water:


Was re-purposed for sippy cups. Just print the label wraps out, cut them to size, put them in the cups and you're done!

I wanted to do some personalized cups too, so I simply added names to blank party labels and repeated the steps above.
Now really, does it get any easier than that? I don't think so. I love projects like these two - they're easy peasy but make a big impact. Your guests will think you spent a lot more time - and money - than you actually did, and your dessert table or buffet will look fabulous with all of these goodies lined up for the grabbing!


So what are you waiting for? Head on over to enter our giveaway for the Happy Halloween Printable Collection from Anders Ruff so you can get started on your own frightening fun. If you can't wait to get yours, you can buy the set in the Anders Ruff store. For just $15, you get $250 worth of graphics you can use hundreds of ways. No tricks, just treats!
And I've got one more treat for a lucky AFOMFT reader - we're giving away one dozen of the Design-Your-Own Cups from Oriental Trading! To enter, post a comment here telling me how you'll use them (this is mandatory). For additional entries:
- Subscribe to AFOMFT via e-mail or follow via GFC and post a comment here telling me you do.
- "Like" AFOMFT on Facebook
- Follow AFOMFT on Twitter (@AFOMFT or click the birdie icon on the sidebar) and tweet this post by clicking the graphic above or this giveaway: Get 31 days of Halloween crafts, recipes and giveaways during Get Your Ghoul On! Month @AFOMFT Don't miss out! - http://bit.ly/9wpRJG
- Click here to vote for AFOMFT on Top Baby Blogs and post a comment here that you did -
 . You can vote once per day per computer so if you vote every day or on different computers, be sure to post one comment for each one.
 - Grab our button and put it on your blog or website and post a link here showing us.
- Grab our GET YOUR GHOUL ON! MONTH button from the sidebar and put it on your blog or website and post a link here showing us.
- Blog or post on Facebook about this giveaway with a link to this post (worth 2 entries so please post two comments) and make sure your comments include a link to your status or blog post.
I'm sharing these projects on:

Images: AFOMFT, Ryan Trupp Photography & Anders Ruff
No comments:
Post a Comment