
GET YOUR GHOUL ON! MONTH continues with the second of my simple and spooktacular Halloween craft project posts. If you missed the first one, featuring DIY snack cups and personalized sippies, you find it HERE. Today, I'm going to show you how to make fright-astic milk cartons and a Boo-tiful backdrop. Let's get started!
I first made these milk cartons for Gabrielle and Alaina's second birthday party.

We filled them with Cheerios, raisins and goldfish and called it Toddler Trail Mix but you could fill them with anything - little toys, animal crackers, whatever - so I figured it would be fun to make some for Halloween too. Here's the how to:
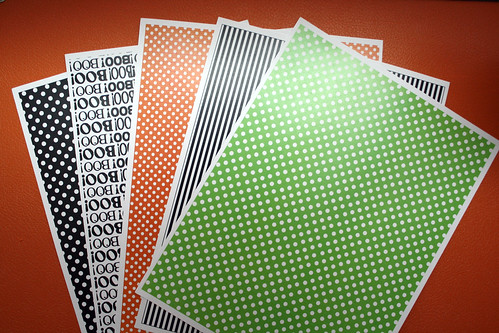
1. Get some patterned paper. I suggest using something thicker than scrapbook paper - it should be more like card stock so the boxes hold their shape. Using the Happy Halloween Printable Collection from Anders Ruff, I printed their patterned paper designs onto card stock.
2. Print out the milk carton template (you can find it below). Following the key on the template, score your paper on the non-patterned side. You can do this using a ruler, a paper bone folder or my personal preference, the Martha Stewart Scoreboard.

3. Once the paper is scored, cut along the lines that are solid on the template. Your paper will now look like this:

4. Holding the paper like it is above with the cuts at the bottom, gently crease along the top two horizontal score lines but don't fold (you just want to leave them creased so they will be easy to fold later). Then fold all of the vertical scores so your paper now forms a loose carton shape.

5. Using a glue stick or glue dots, apply adhesive along the small tab:

And press it to the inside of the opposite flap to attach the two sides together forming a rectangular carton. I put a paper clip on top to hold the pieces together until they dry.

6. Once the glue has dried (about 5 minutes), flip the carton over so that the cut sections are on top. Fold two opposite flaps inward:

And apply glue to the undersides of the other two before folding them in to close off the bottom of the carton. Press firmly to set the glue and let dry.
7. Flip the carton right side up. Two of the sides have triangular shaped scores on them - gently push those inward and they will naturally fold like a milk carton does.

8. Secure the top of the carton with a clip, sticker or clothes pin, or punch holes and run ribbon through to close (see middle box below). You're done! Or not. You can decorate them more if you like - I attached some of the Happy Halloween Printable logos to mine.

A huge thank you to my wonderful friend Andreina who is a whiz at Powerpoint and helped me make a template for these milk cartons to share with you. You can find it here:
AFOMFT Milk Carton Template
I know, you're probably thinking that making one of these sounds really difficult but give one a try - I bet you'll be surprised at how easy it is!
And speaking of easy, up next is quite possibly the simplest project ever. I printed the 2 inch party logo designs from the Happy Halloween Printable Collection onto card stock and used my 2 inch scalloped and round paper punches to cut them all out.

Then I taped them to strands of curling ribbon, and taped those strands to ceiling and presto! Instant streamers!

They're perfect to use as the backdrop for a table or to hang in windows or doorways. And I wasn't kidding when I said these were simple - your four year old could probably make them!
So there you have 'em - what I'm calling Creepy Cartons and Scary Streamers.


Two more easy ideas for your Halloween bash. Be sure to check out my other post for instructions on how to make Spooky Snack Cups and Petrifying Personalized Sippy Cups (yup, I'm way too into this Halloween adjective thing) and yesterday's round up of free BOO! printables.
And don't forget to enter our giveaway for the Happy Halloween Printable Collection from Anders Ruff so you can get started on your own frightening fun. If you can't wait to get yours, you can buy the set in the Anders Ruff store. For just $15, you get $250 worth of graphics you can use hundreds of ways. No tricks, just treats!
And I've got one more treat for a lucky AFOMFT reader - this happens to be my 500th post so we're giving away my absolute favorite crafting tool - the Martha Stewart Score Board!

- Subscribe to AFOMFT via e-mail or follow via GFC and post a comment here telling me you do.
- "Like" AFOMFT on Facebook
- Follow AFOMFT on Twitter (@AFOMFT or click the birdie icon on the sidebar) and tweet this post by clicking the graphic above or this giveaway: It's Get Your Ghoul On Month and you could #win a @MarthaStewart Score Board from @AFOMFT Don't miss out! - http://bit.ly/9wpRJG
- Click here to vote for AFOMFT on Top Baby Blogs and post a comment here that you did -
 . You can vote once per day per computer so if you vote every day or on different computers, be sure to post one comment for each one.
 - Grab our button and put it on your blog or website and post a link here showing us.
- Grab our GET YOUR GHOUL ON! MONTH button from the sidebar and put it on your blog or website and post a link here showing us.
- Blog or post on Facebook about this giveaway with a link to this post (worth 2 entries so please post two comments) and make sure your comments include a link to your status or blog post.
I'm sharing these projects on:

Images: AFOMFT, Ryan Trupp Photography & Anders Ruff
No comments:
Post a Comment